
My mom gave this Thalappakatti Biriyani recipe cut out that was published in a magazine years ago. She likes to save recipes from magazines that she finds interesting and keeps it for me. This is one such gem. She takes a lot of joy in sharing these things with me. She had brought this Thalappakatti Biriyani recipe with her on her trip to California when she had come for helping with my first pregnancy. This Thalappakatti Biriyani recipe comes from a chef called Nagendran of Thalapakatti hotel in Dindigul. I had to try this Thalappakatti Biriyani recipe as the content looked authentic. I would say this Thalappakatti Biriyani recipe is the closest thing to the real one. I kind of adapted this Thalappakatti Biriyani recipe and scaled down the recipe a bit. It has a very nice flavor that is so different from all the other biriyani. Seeraga Samba biriyani has to be the pride of Tamilnadu. Seeraga samba is a very aromatic rice. The grain of the rice is very tiny and it gets its name for its resemblance to Cumin seeds, also called as Seeragam/Jeera in Tamil. It has a very distinct taste, fluffs up well when cooked and south Indian biriyani’s are made with this rice. Samba rice is grown for a longer duration than other types of rice. Here is how I do it. Heads up – There is a lot of peeling and grinding involved. So plan accordingly.


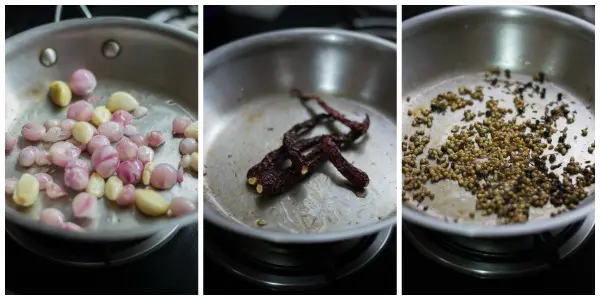
We need garlic. Like lots of garlic. Indian garlic is ridiculously small. Peel the garlic. Crush the garlic in a mixie without adding any water. Set aside.

Peel shallots. We call it as chinna vengayam – small onions. Crush the shallots in a mixie without adding any water. Set aside.
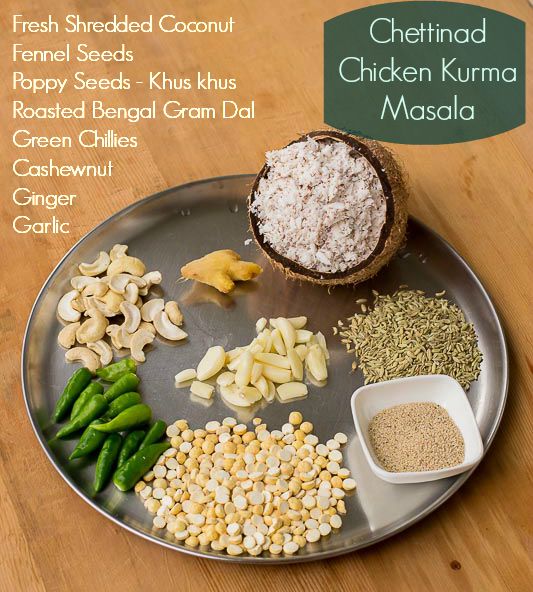
 The Thalappakatti Biriyani Masala
I think this is what makes this Thalappakatti Biriyani very unique. The original recipe says to use 8 green chillies . I used only 2 as my little one loves this biriyani and I do not want him to scream for water while eating. You can use green chillies according to your taste. Grind all the below ingredients to a very fine smooth paste. Add 1/4 cup of water while grinding. Chop the ginger into small pieces and break the cinnamon into bits before grinding.
 Soak the rice in water now. The rice needs to soak for half an hour.
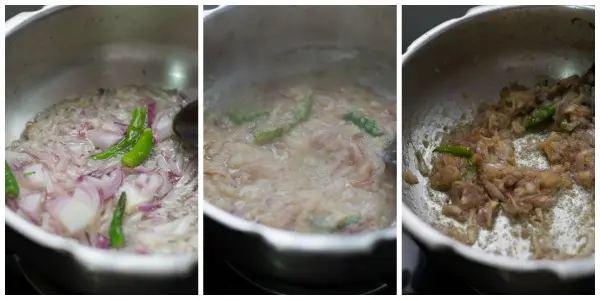
Heat Oil and ghee in a heavy pan and add in the Thalappakatti Biriyani Masala paste, crushed garlic and crushed shallots-small onions. Fry on medium flame for a good 10 minutes until the oil separates from the mixture.

Add in the chicken. Add in the chilli powder. The ratio of rice to chicken should be 1 rice to 1.5 meat. Saute the chicken so the Thalappakatti Biriyani masala coats evenly. Reduce the flame to simmer and cover it with a lid and let it cook. Don’t add any water. The chicken will cook in its own juices. Just saute once in 5 minutes so the chicken doesn’t scorch in the bottom. After 15 minutes, the chicken should be done and there should be some gravy too.

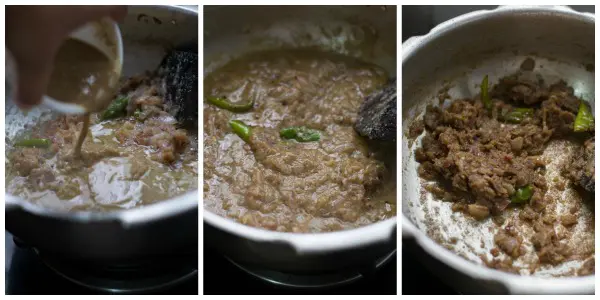
Add in the yogurt/curd. Cook with the lid open for 5 minutes.

Remove the cooked meat to a bowl and roughly measure how much liquid is left behind. Mine had about 1.5 cups of liquid. Just measure roughly. It need not be accurate.

Measurements used – 1 cup rice = 250 ml
We are using 2 cups rice and 750 grams meat. We require 2 times water to the quantity of rice. So we need to add 4 cups water. There was already 1.5 cups gravy that we measured before. So I added 2.5 cups water to the mixture. Add salt. Add in the chopped coriander leaves and the mint leaves. Let the mixture come to a boil.

Add back the meat and let it come to a boil again. Check for seasoning. Add more salt if necessary.

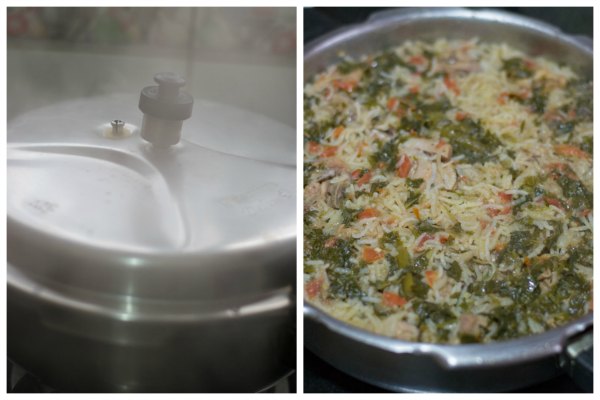
Drain the soaked rice and add it to the pan. Wait for it to boil. Add in the lemon juice.

Cover the pan with a lid and let it cook for the first four minutes on medium flame. Open the lid. Gently mix once from the bottom, cover the lid again and simmer for 10 minutes on very low flame.

After that time, open the lid and see if the rice has been cooked. Cook for a couple of minutes more if necessary. Switch off the flame and close the pan with a lid. Do not disturb for the next 20 minutes. The rice will get swollen and absorb all the left out moisture. This time is very important. Do not rush.

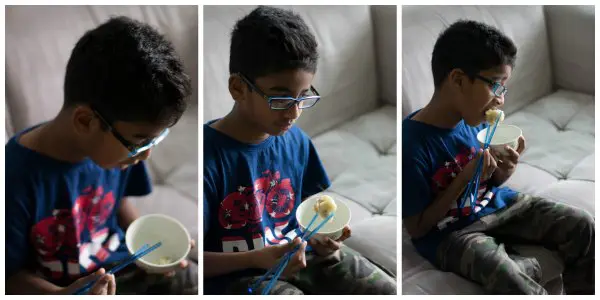
After the rest, Enjoy Thalappakatti Biriyani!
- 5 Green Chillies
- 3 small two inch cinnamon sticks
- 3 cardamom
- 3 cloves
- ⅛th of a nutmeg (Jaadhikai)
- 1 small piece Mace (Jaadhi Pathiri)
- 50 grams ginger
- 500 ml Seeraga Samba Rice
- 750 grams Chicken with bone
- Meat to Rice Ratio - 1 Rice 1.5 Meat
- 25 grams Ghee
- 75 grams Sunflower Oil
- 50 grams crushed Garlic
- 50 grams crushed shallots (small onions)
- ½ teaspoon Red Chilli Powder
- ½ cup curd
- 11/2 teaspoon salt
- 1 hand full Mint Leaves
- 2 hand full Coriander Leaves
- Juice of half a lime
- Peel the garlic. Crush the garlic in a mixie without adding any water. Set aside. Crush the shallots in a mixie without adding any water. Set aside.
- Grind all the masala ingredients to a very fine smooth paste. Add ¼ cup of water while grinding. Chop the ginger into small pieces and break the cinnamon into bits before grinding.
- Soak the rice in water now. The rice needs to soak for half an hour.
- Heat Oil and ghee in a heavy pan and add in the Masala paste, crushed garlic and crushed shallots-small onions. Fry on medium flame for a good 10 minutes until the oil separates from the mixture.
- Add in the chicken. Add in the chilli powder. The ratio of rice to chicken should be 1 rice to 1.5 meat. Saute the chicken so the masala coats evenly. Reduce the flame to simmer and cover it with a lid and let it cook. Don’t add any water. The chicken will cook in its own juices. Just saute once in 5 minutes so the chicken doesn’t scorch in the bottom. After 15 minutes, the chicken should be done and there should be some gravy too.
- Add in the yogurt/curd. Cook with the lid open for 5 minutes.
- Remove the cooked meat to a bowl and roughly measure how much liquid is left behind. Mine had about 1.5 cups of liquid. Just measure roughly. It need not be accurate.
- We are using 2 cups rice and 750 grams meat. We require 2 times water to the quantity of rice. So we need to add 4 cups water. There was already 1.5 cups gravy that we measured before. So I added 2.5 cups water to the mixture. Add salt. Add in the chopped coriander leaves and the mint leaves. Let the mixture come to a boil.
- Add back the meat and let it come to a boil again. Check for seasoning. Add more salt if necessary.
- Drain the soaked rice and add it to the pan. Wait for it to boil. Add in the lemon juice.
- Cover the pan with a lid and let it cook for the first four minutes on medium flame. Open the lid. Gently mix once from the bottom, cover the lid again and simmer for 10 minutes on very low flame.
- After that time, open the lid and see if the rice has been cooked. Cook for a couple of minutes more if necessary. Switch off the flame and close the pan with a lid. Do not disturb for the next 20 minutes. The rice will get swollen and absorb all the left out moisture. This time is very important. Do not rush.
- After the rest, Enjoy!
The post Tamilnadu Thalappakatti Biriyani appeared first on Kannamma Cooks.
 Tamilnadu Style Muslim Chicken Biriyani – தமிழ் பாய் வீட்டு கோழி பிரியாணி


 The masala powders for this recipe include turmeric powder, chilli powder and coriander powder. It is added in the ratio of 0.5:1:2. I added 1/2 tablespoon turmeric powder, 1 tablespoon chilli powder and 2 tablespoon coriander powder. So do not change this ratio.


 For ingredient measurements and instructions for Thala Ajith Biryani, scroll to the bottom of the page.


